Google Form - Response Emailer

SKILL LEVEL: Beginner
In this article, we will be using Google Apps Script (GAS) to process a Google Forms submission and send an email using Gmail. Let's dive in!
Creating your form
You can use your own form, or create one if you're starting from scratch. For this article, let's create a form that customers can use to submit feedback on a service or product.
- Go to Google Forms
- Click the Blank form to create an empty form.
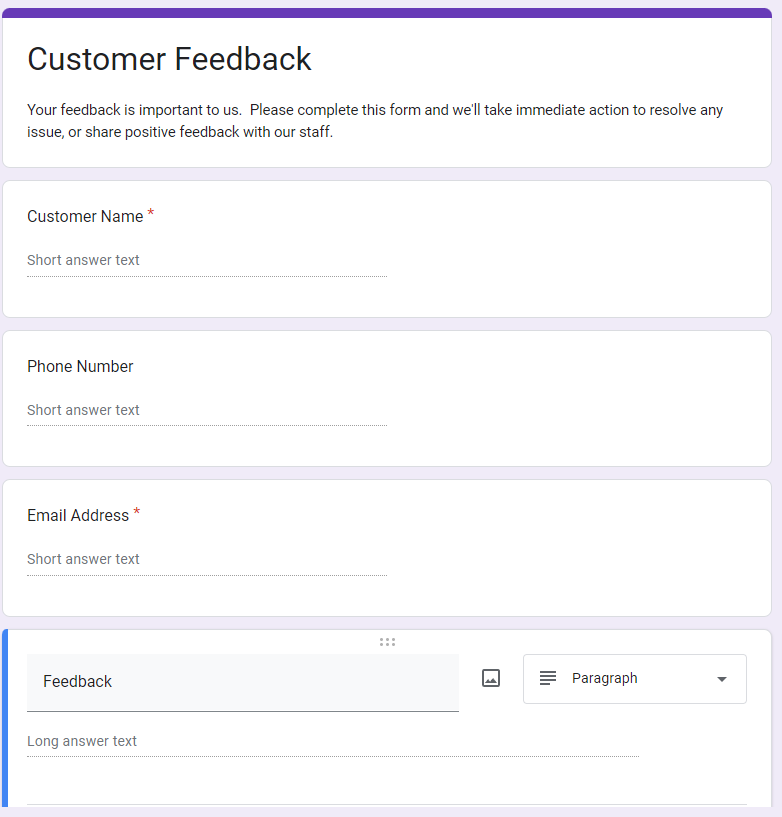
- Add a few fields:
- Customer Name
- Phone Number
- Email Address
- Feedback
It should look something like this:
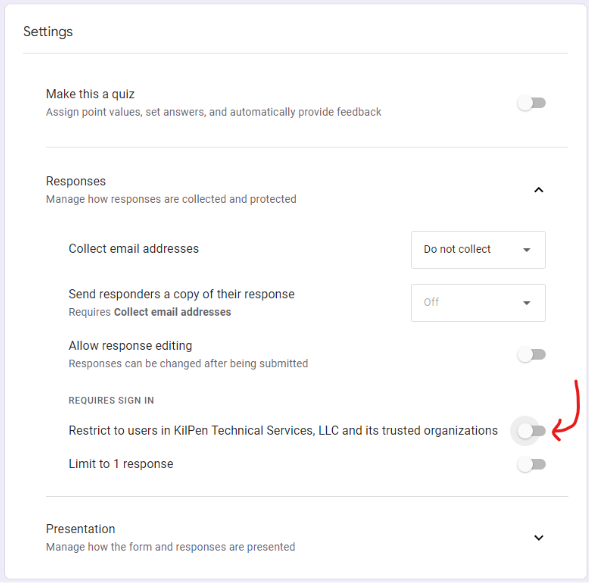
Once your complete, don't forget to adjust the settings to allow submissions from outside your Google Workspace domain.
- Click Settings on the top navigation bar.
- Expand the section titled Responses
- Toggle the option "Restrict to users in your domain and its trusted organizations" to off.
Edit your form's scripting
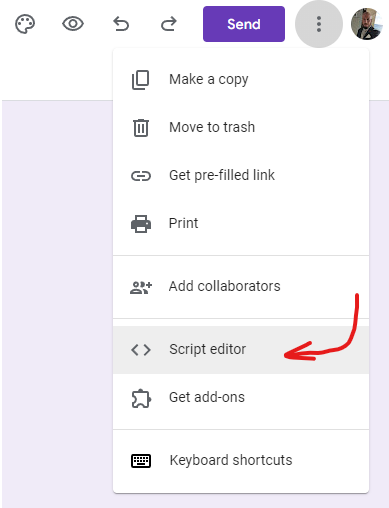
In the upper right hand of your form, click the vertical elipsis and select Script Editor.
Now that you're in the script editor, we'll need to copy/paste the Google Apps Script (GAS) code into the editor.
- Let's start be giving the project a name. Click the Untitled Project text and change it to something like Customer Feedback Form Script.
- Delete the contents of Code.gs by highlighting the funtion myFunction(){} and pressing delete.

Now let's copy the new code from the this blog and paste it into the Code.gs file.
//#### Variables -  Complete this section ####
// Email Header information
const emailHeader = {
  to: "[email protected]",
  fromName: "KilPen Technical Services",
  subject: "Someone submitted feedback on a Google Form."
}

// Body of the email being sent by this script
const emailBody = {
  imageUrl: "https://kilpen.com/images/logo_header.png",
  messageIntro: "Hello Customer Care",
  messageMain: "Someone has completed the support request form.  Please review the below information and create a support ticket.",
  messageOutro: "KilPen Automator",
  footerText: "Need assistance?",
  footerButtonText: "KilPen Helpdesk",
  footerButtonUrl: "https://help.kilpen.com",
  formSourceUrl: "https://docs.google.com/forms/d/[UPDATE THIS]/edit"
}
//#### END VARIABLES ####

function onFormSubmit(e) {
  Logger.log(`Starting form auto-responder...`);


  try{

  var items = e.response.getItemResponses();

  var respondent = {
    title: "Respondent",
    ans: e.response.getRespondentEmail()
    }


  var responses = [];
  responses.push(respondent);

  for (var i in items){
    var response = {
      title: items[i].getItem().getTitle(),
      ans: items[i].getResponse()
    };

    responses.push(response);
  }


  Logger.log(`Form contains ${responses.length} items.`);


  var templ = HtmlService
    .createTemplateFromFile('template')

  templ.responses = responses;
  templ.emailBody = emailBody;

  Logger.log(`Preparing message for email contents...`);
  var message = templ.evaluate().getContent();

  Logger.log(`Sending Email...`);
  MailApp.sendEmail({
    to: emailHeader.to,
    name: emailHeader.fromName,
    subject: emailHeader.subject,
    htmlBody: message
  });

  Logger.log(`Message sent: ${message}`);
  }catch(e){
    Logger.log(`Something went wrong. ${e}`)
  }

}


function grantPermissions(){
 var form = FormApp.getActiveForm().getResponses();

 return;

}
So far so good! Now let's add the email template that will be sent when a customer completes the feedback form.
- In the Files section of the script editor, click the + symbol and select HTML.
- Type 'template' to change the file's name.
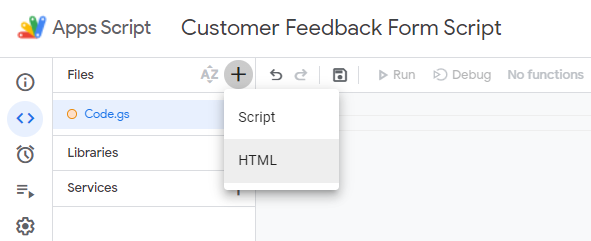
- Copy and paste the below HTML into the template.html file.
<!doctype html>
<html>
<head>
<meta charset="utf-8">
<!-- utf-8 works for most cases -->
<meta name="viewport" content="width=device-width, initial-scale=1.0">
<!-- Forcing initial-scale shouldn't be necessary -->
<meta http-equiv="X-UA-Compatible" content="IE=edge">
<!-- Use the latest (edge) version of IE rendering engine -->
<title>Form Responder</title>
<!-- The title tag shows in email notifications, like Android 4.4. -->
<!-- Please use an inliner tool to convert all CSS to inline as inpage or external CSS is removed by email clients -->
<!-- important in CSS is used to prevent the styles of currently inline CSS from overriding the ones mentioned in media queries when corresponding screen sizes are encountered -->
<!-- CSS Reset -->
<style type="text/css">
/* What it does: Remove spaces around the email design added by some email clients. */
/* Beware: It can remove the padding / margin and add a background color to the compose a reply window. */
html, body {
margin: 0 !important;
padding: 0 !important;
height: 100% !important;
width: 100% !important;
}
/* What it does: Stops email clients resizing small text. */
* {
-ms-text-size-adjust: 100%;
-webkit-text-size-adjust: 100%;
}
/* What it does: Forces Outlook.com to display emails full width. */
.ExternalClass {
width: 100%;
}
/* What is does: Centers email on Android 4.4 */
div[style*="margin: 16px 0"] {
margin: 0 !important;
}
/* What it does: Stops Outlook from adding extra spacing to tables. */
table, td {
mso-table-lspace: 0pt !important;
mso-table-rspace: 0pt !important;
}
/* What it does: Fixes webkit padding issue. Fix for Yahoo mail table alignment bug. Applies table-layout to the first 2 tables then removes for anything nested deeper. */
table {
border-spacing: 0 !important;
border-collapse: collapse !important;
table-layout: fixed !important;
margin: 0 auto !important;
}
table table table {
table-layout: auto;
}
/* What it does: Uses a better rendering method when resizing images in IE. */
img {
-ms-interpolation-mode: bicubic;
}
/* What it does: Overrides styles added when Yahoo's auto-senses a link. */
.yshortcuts a {
border-bottom: none !important;
}
/* What it does: Another work-around for iOS meddling in triggered links. */
a[x-apple-data-detectors] {
color: inherit !important;
}
</style>
<!-- Progressive Enhancements -->
<style type="text/css">
/* What it does: Hover styles for buttons */
.button-td,
.button-a {
transition: all 100ms ease-in;
}
.button-td:hover,
.button-a:hover {
background: #b8252c !important;
border-color: #b8252c !important;
}
/* Media Queries */
@media screen and (max-width: 600px) {
.email-container {
width: 100% !important;
}
/* What it does: Forces elements to resize to the full width of their container. Useful for resizing images beyond their max-width. */
.fluid,
.fluid-centered {
max-width: 100% !important;
height: auto !important;
margin-left: auto !important;
margin-right: auto !important;
}
/* And center justify these ones. */
.fluid-centered {
margin-left: auto !important;
margin-right: auto !important;
}
/* What it does: Forces table cells into full-width rows. */
.stack-column,
.stack-column-center {
display: block !important;
width: 100% !important;
max-width: 100% !important;
direction: ltr !important;
}
/* And center justify these ones. */
.stack-column-center {
text-align: center !important;
}
/* What it does: Generic utility class for centering. Useful for images, buttons, and nested tables. */
.center-on-narrow {
text-align: center !important;
display: block !important;
margin-left: auto !important;
margin-right: auto !important;
float: none !important;
}
table.center-on-narrow {
display: inline-block !important;
}
}
</style>
</head>
<body bgcolor="#949494" width="100%" style="margin: 0;" yahoo="yahoo">
<table bgcolor="#949494" cellpadding="0" cellspacing="0" border="0" height="100%" width="100%" style="border-collapse:collapse;">
<tr>
<td><center style="width: 100%;">
<!-- Visually Hidden Preheader Text : BEGIN -->
<div style="display:none;font-size:1px;line-height:1px;max-height:0px;max-width:0px;opacity:0;overflow:hidden;mso-hide:all;font-family: sans-serif;"> Form Auto Emailer </div>
<!-- Visually Hidden Preheader Text : END -->
<!-- Email Header : BEGIN -->
<!-- Email Header : END -->
<!-- Email Body : BEGIN -->
<table cellspacing="0" cellpadding="0" border="0" align="center" bgcolor="#ffffff" width="600" class="email-container">
<!-- Hero Image, Flush : BEGIN -->
<tr>
<td class="full-width-image"><img src="<?= emailBody.imageUrl ?>" width="600" alt="Reset Logo" border="0" align="center" style="width: 100%; max-width: 600px; height: auto;"></td>
</tr>
<!-- Hero Image, Flush : END -->
<!-- 1 Column Text : BEGIN -->
<tr>
<td style="padding: 40px; text-align: left; font-family: sans-serif; font-size: 15px; mso-height-rule: exactly; line-height: 20px; color: #555555;"> <p><?= emailBody.messageIntro ?>,</p><p><?= emailBody.messageMain ?><p><?= emailBody.messageOutro ?></p></emphasis></p><hr><h2>Form Details</h2>
<? for (var i = 0; i < responses.length; i++) { ?>
<strong><?= responses[i].title ?>: </strong><?= responses[i].ans ?><br />
<? } ?>
</p>
<br>
</td>
</tr>
<!-- 1 Column Text : BEGIN -->
<!-- Thumbnail Left, Text Right : BEGIN -->
<tr>
<td dir="ltr" bgcolor="#333333" align="center" valign="top" width="100%" style="padding: 10px;">
<table align="center" border="0" cellpadding="0" cellspacing="0" width="100%">
<tr>
<td dir="ltr" valign="top" style="font-family: sans-serif; font-size: 15px; mso-height-rule: exactly; line-height: 20px; color: #FFFFFF; padding: 10px; text-align: center;" class="center-on-narrow"><strong style="color:#FFFFFF;"><?= emailBody.footerText ?></strong> <br><br>
<!-- Button : Begin -->
<table cellspacing="0" cellpadding="0" border="0" class="center-on-narrow" style="float:center;">
<tr>
<td style="border-radius: 3px; background: #C5272e; text-align: center;" class="button-td"><a href="<?= emailBody.footerButtonUrl ?>" style="background: #c5272e; border: 15px solid #c5272e; padding: 0 10px;color: #ffffff; font-family: sans-serif; font-size: 13px; line-height: 1.1; text-align: center; text-decoration: none; display: block; border-radius: 3px; font-weight: bold;" class="button-a">
<!--[if mso]> <![endif]--><?= emailBody.footerButtonText ?><!--[if mso]> <![endif]-->
</a></td>
</tr>
</table>
<!-- Button : END -->
</td>
</tr>
</table>
</td>
</tr>
<!-- Thumbnail Left, Text Right : END -->
</table>
<!-- Email Body : END -->
<!-- Email Footer : BEGIN -->
<table align="center" width="600" class="email-container">
<tr>
<td style="padding: 40px 10px;width: 100%;font-size: 12px; font-family: sans-serif; mso-height-rule: exactly; line-height:18px; text-align: center; color: #000000;"><webversion style="color:#000000; text-decoration:underline; font-weight: bold;"></webversion>
This email has been generated by scripting powered by KilPen Technical Services.<br>Source: <?= emailBody.formSourceUrl ?>
<br>
<br>
</td>
</tr>
</table>
<!-- Email Footer : END -->
</center>
</td>
</tr>
</table>
</body>
</html>
Customize the script
In the script editor, navigate to the code.gs file and locate the Variables section at the very top of the file.
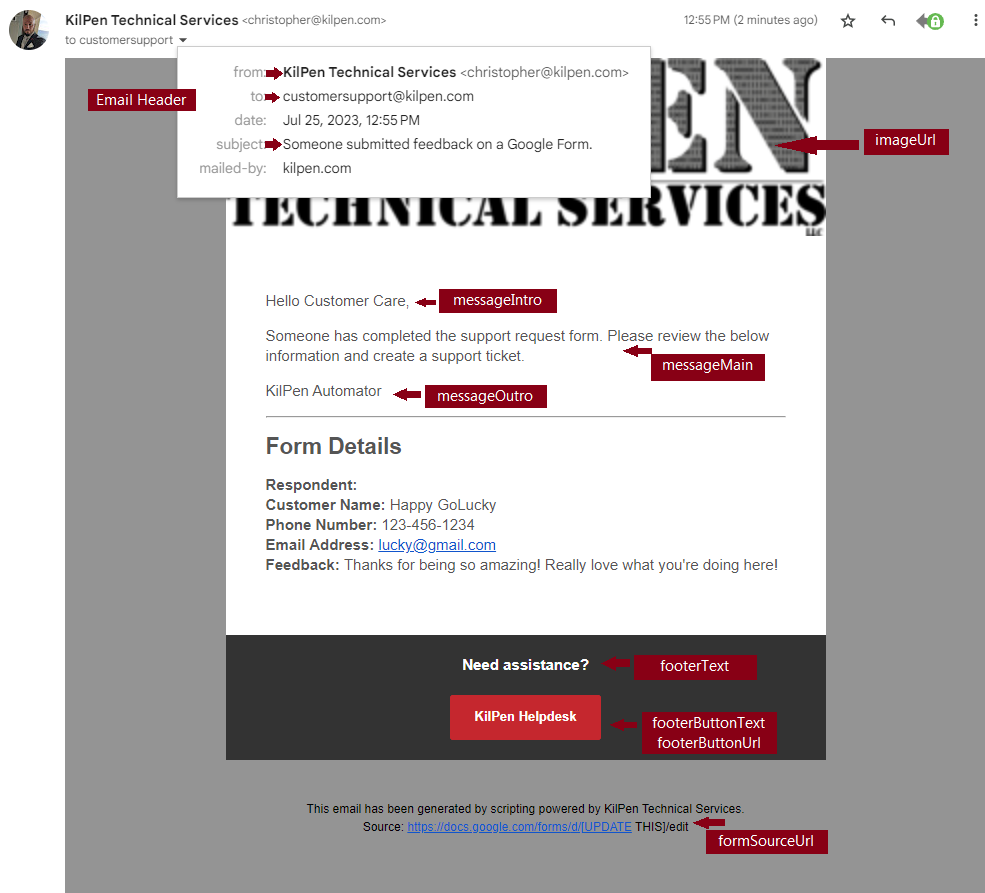
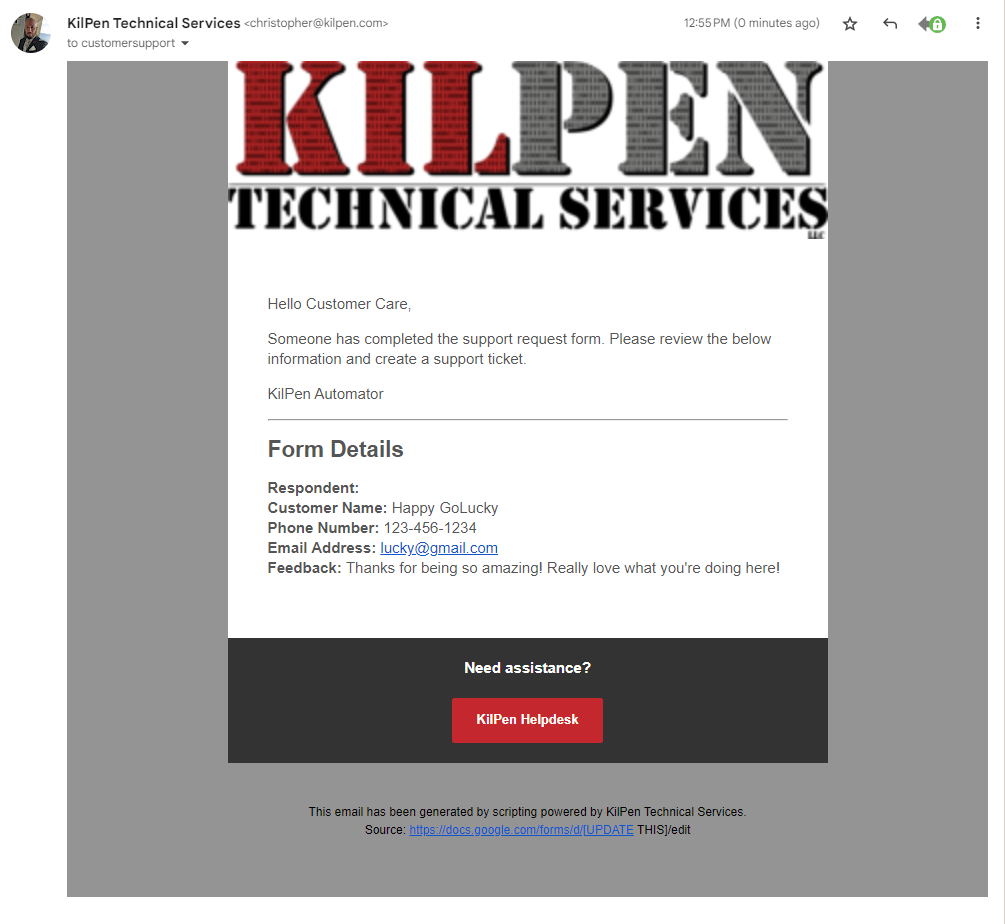
Let's work backwards for a second and review the final email that will be sent. Then the variables might make more sense.
Here is what the final email will look like:
And here are the variables:
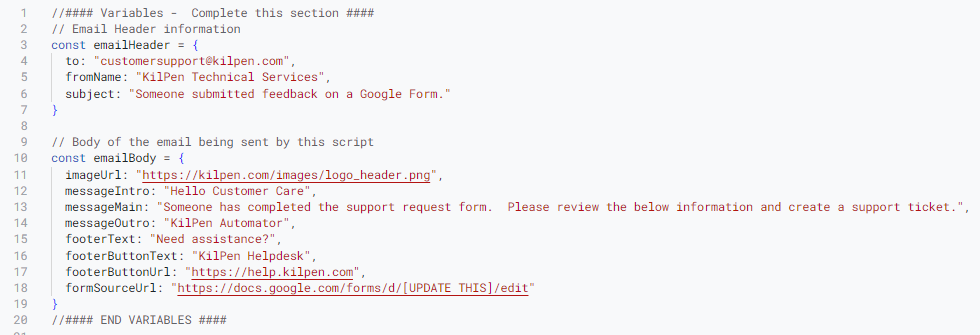
The variables are broken into two sections:
- Email Header (const emailHeader)
- to: The email address that will receive this email notification.
- fromName: The name on the email whom it was sent from.
- subject: The subject line of the email that is being sent.
- Email Body (consnt emailBoday)
- imageUrl: A URL with an image to display in the email header.
- messageIntro: The name of who this message is addressed to.
- messageMain: The main body of the message.
- messageOutro: The name of whomever is sending the message.
- footerText: The message above the button.
- footerButtonText: The text on the surface of the button.
- footerButtonUrl: The URL we want the button to point to.
- formSourceUrl: The URL of the form we created.
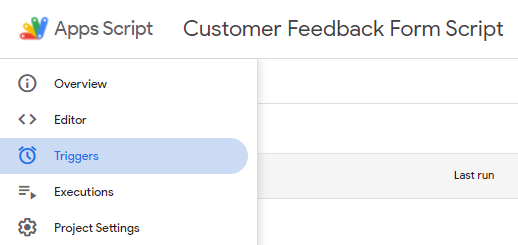
Set a form trigger
On the left hand side of the script editor, select the Triggers option. It's the alarm clock looking logo.
Now click the blue +Add Trigger button in the lower right.
Here are the values we're looking for:
- Choose which function to run: OnFormSubmit
- Choose which deployment should run: Head
- Select event source: From form
- Select event type: On form submit
Now click the Save button.
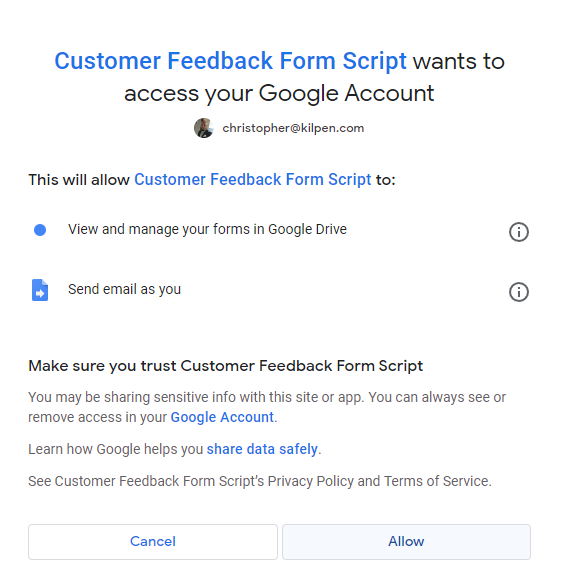
You'll be prompted to authorize your script to run.
- Select your Google Account which will be running this script.
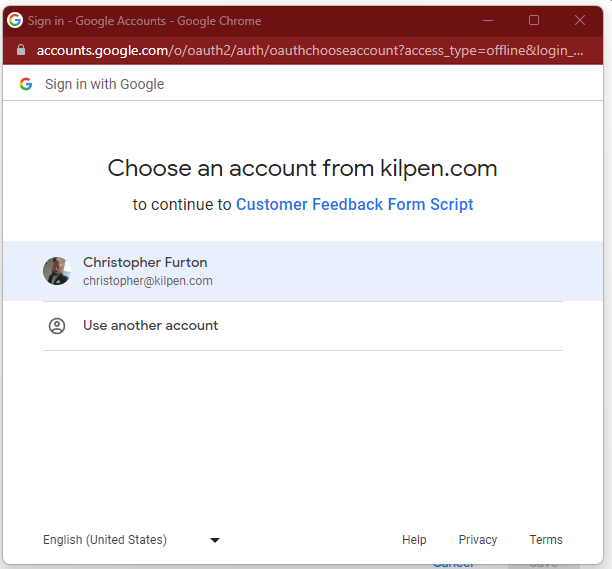
- Click "Allow"
Give it a test!
That was it. Let's test a form submission and wait for the email.
- Open the tab which had the Customer Feedback form. It's probably to the left of script editor tab.
- Select the eyeball icon which is the form preview.
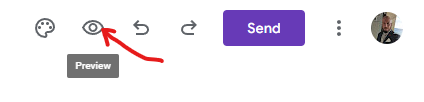
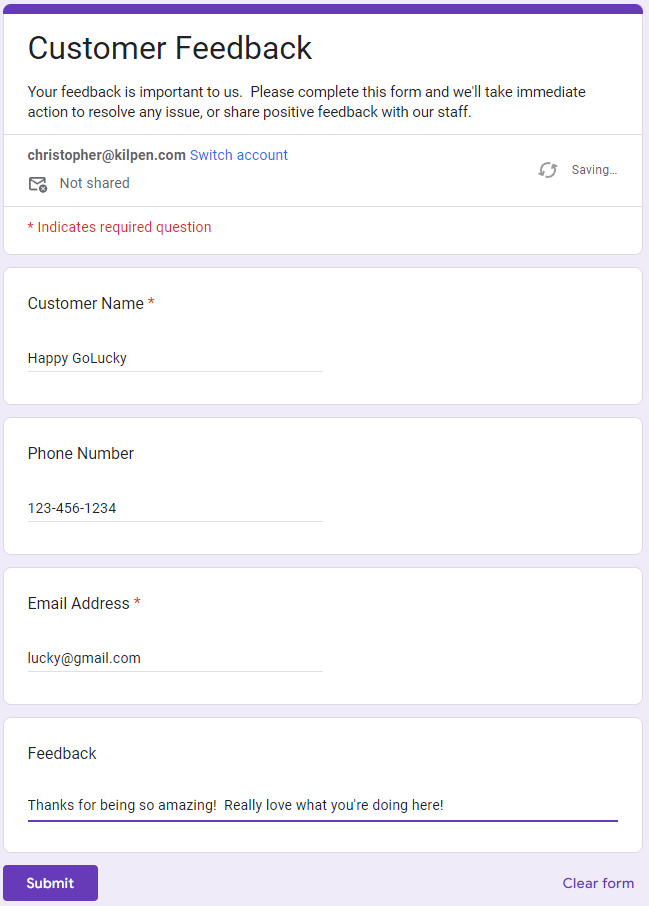
- The LIVE version of your form will open in another tab. This is the URL that we want to share with our customers. Let's enter some test data and click submit.
If you were successful, the email address specified in the Variables should have received an email that looks like this:
Need more help?
KilPen Technical Services can help you with your project! Contact Us and we'll get right back to you.
Give a kudos
Did you find this article helpful? If so, please consider signing up and leaving a comment.
You can also: